CPU Thermal Paste: When to Repaste and How to Do It Without Wrecking Your Temps
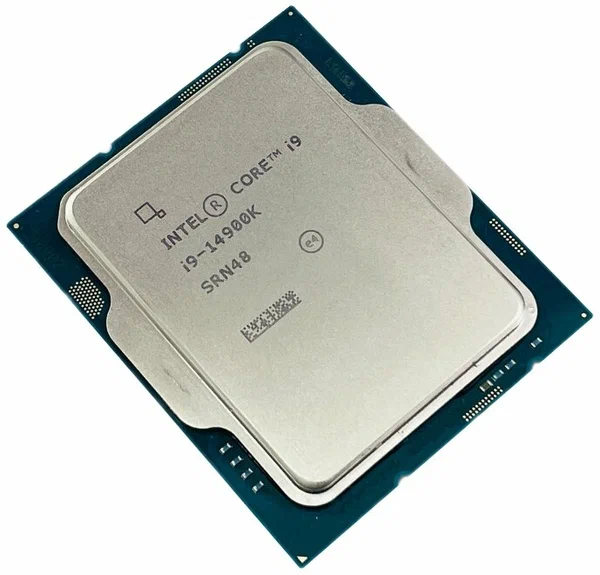
Thermal interface material, almost always called thermal paste or TIM, is the thin layer that fills microscopic gaps between a CPU's integrated heat spreader and the base of its cooler. It sounds like a minor detail, but a bad application or a paste that has dried out after years of use can cost you ten degrees Celsius or more under load, and on a high-TDP chip that difference can be the line between stable boost clocks and thermal throttling. Repasting is one of the cheapest performance-recovery jobs in PC maintenance, and it is also one of the most commonly done incorrectly.
Signs Your CPU Needs a Repaste
The clearest signal is a gradual climb in idle and load temperatures over the years without any change in ambient room temperature, case airflow, or overclock settings. Most paste formulas are rated to remain effective for two to five years depending on the compound; cheaper stock paste that ships pre-applied on some coolers tends to degrade faster than premium aftermarket compounds. If your chip is a high-TDP part like a 253 W peak turbo processor and it has never been repasted since a first build several years ago, checking is worth the twenty minutes it takes. A second, more urgent signal is a cooler that was ever removed and reseated without fresh paste applied — reusing old, already-spread paste is one of the most common causes of unexpectedly high temperatures after a case upgrade or cooler swap.
Choosing a Paste for the Job
Paste chemistry matters less than people assume once you are past the very cheapest stock options — most mid-range and premium carbon or ceramic-based pastes perform within a couple of degrees of each other in independent testing. Liquid metal compounds can outperform standard paste by several degrees, but they are electrically conductive, cannot be used on bare aluminum coolers without a nickel-plated base, and carry real risk of damaging a motherboard or GPU if a droplet migrates onto surrounding components. For most builders, a reputable non-conductive paste applied correctly will get temperatures within a small margin of liquid metal without any of the risk, and that is the right trade-off for anyone who is not specifically chasing the last few degrees on a benchmark-focused build.
Application: Amount and Pattern
The single most common mistake is using too much paste. A pea-sized dot in the center of the integrated heat spreader is enough for the vast majority of consumer CPUs — the clamping pressure from the cooler's mounting mechanism spreads it into an even layer across the die area. Applying an X-pattern or full-coverage spread by hand is unnecessary on modern coolers and increases the risk of trapping air bubbles or leaving thicker patches at the edges, both of which reduce heat transfer versus the pump-out effect of a properly clamped small dot. On a large integrated heat spreader like Intel's LGA1700 package, a slightly larger dot or a thin line down the center is reasonable, but more paste is never better once you have full coverage — excess simply squeezes out the sides.
Before applying new paste, clean off every trace of the old layer with isopropyl alcohol above 90% concentration and a lint-free cloth, on both the CPU's heat spreader and the cooler's base plate. Any leftover dried paste creates an uneven surface that a fresh application cannot fully compensate for.
Mounting Pressure and Reseating
Paste quality and quantity only matter if the cooler is seated with correct, even pressure. Overtightened mounting screws can bow a motherboard's PCB slightly and actually create an uneven gap at the center of the die, while undertightened mounting leaves the interface too thick. Follow the cooler manufacturer's torque or tightening-pattern instructions, typically a star or crossing pattern tightened gradually in small increments rather than one screw driven fully home before moving to the next. This applies equally whether you are cooling a socket AM5 platform or an Intel LGA1700 build — the mounting mechanism differs by cooler, but the even-pressure principle is universal.
How Often Should You Repaste?
- Every 2-3 years for high-end air or liquid coolers under regular gaming or workstation load.
- Immediately after removing a cooler for any reason — never reuse old, already-compressed paste.
- Sooner than the typical interval if you notice load temperatures creeping up 5°C or more compared to when the system was new.
- Not necessary purely because a system is "old" if temperatures are still stable and paste has not physically failed — repasting a cooler that is performing fine is unnecessary maintenance.
If your temperatures remain high even after a careful repaste with correct mounting pressure, the bottleneck may not be the paste at all — it could be inadequate case airflow or a cooler that is simply undersized for the chip's TDP. Readers building around a high-TDP flagship should also compare our air vs liquid cooling guide and our CPU core count vs clock speed breakdown to make sure the cooler and chip pairing was appropriate before assuming a repaste alone will solve a thermal problem.
Tools Worth Having Before You Start
Beyond the paste itself, a repaste job goes far more smoothly with a small set of dedicated tools rather than improvised substitutes. High-percentage isopropyl alcohol and lint-free wipes or coffee filters (which shed far less lint than paper towels) handle cleanup. A plastic spudger or old gift card helps spread paste evenly if your chosen application method calls for it, without scratching the heat spreader the way a metal tool can. If your cooler uses a backplate with spring-loaded standoffs, keep the original mounting hardware organized — mixing up spring tension washers between socket types is a common source of uneven mounting pressure on a reinstall. Finally, a small flashlight makes it much easier to confirm full, even paste coverage after the first boot-up test, since dim case interiors can hide thin spots that later show up as localized hot patches.
Common Mistakes That Undo a Good Repaste
- Booting the system and running a benchmark before the paste has had a chance to fully spread under normal clamping pressure — give it at least one full thermal cycle before judging results.
- Touching the cleaned heat spreader or cooler base with bare fingers before applying fresh paste, leaving oils that interfere with even spreading.
- Reusing an old cooler mounting bracket that has lost tension or been bent, which prevents even clamping force even with fresh paste correctly applied.
- Mixing two different paste products on the same interface — chemical compatibility between compounds is not guaranteed, and old residue should always be fully removed first.
A careful repaste is a genuinely low-risk maintenance task once you understand the paste-amount, cleaning, and mounting-pressure fundamentals covered above, and it is one of the few upgrades that can meaningfully improve sustained boost clocks on an aging system without spending a cent on new hardware.